Testing Rails applications in the life of a freelancer

Update February 13th: Join the discussion on Hacker News
If you’re part of the Ruby On Rails community for a long time, you’ve probably read tons of articles about testing Rails application (less these days, though). Although there always have been diverging opinions on the matter, it seems the common wisdom was to say that you had to test everything: models, controllers, views and full-stack tests. Oh, and you had to do all of this with a TDD/BDD mindset as well.
I tried to do this myself and quickly concluded it would lead me right into the abyss. You see, it took me way too long to accept that being a freelancer was not the same as being employed in a trendy company with lots of money and resources. Employees will get paid anyway. If they want they can easily convince themselves and their bosses that testing ERB templates and getting 100% code coverage is the most essential thing in the world. In the past I even heard people say that “every real developers” were striving for 100% code coverage and that “they could not even imagine” a rails developer today not doing TDD. At some point it became a sort of religion. You had the heroes on one side, those who wrote more tests in their lives than actual code, and on the other end you had the “undesirable”, those lazy and bad programmers not committed enough to testing.
If I am all by myself, every single thing I do in my work has to bring me real value, otherwise I am losing my energy, time and money.

One day, I was writing a controller spec to make sure that calling the “index” method with a “get” request would return a 200 status code when I realized how absurd it was.

What the heck was I doing? Where was the value of this test? There was none. If the index method returns a 404, it’s because I didn’t create the damn template yet. Why would I deploy my application at this stage? Someone could object that this test will be useful if I somehow delete the index template by mistake. But come on, do we really want to write tests to defend against this kind of stuff? I know I don’t.
Even though I know there are probably ways to write more valuable controller tests, I decided to drop them and concentrate on other tests. Testing views prove to be an even greater waste of time so I dropped them as well.
What was left for me to test? Unit and full-stack tests. Both give me value but of those two, full-stack tests prove to be the most valuable of all.

Full-stack tests are the ones who give me the most value

For me the main purpose of testing is just to obtain an acceptable level of confidence in my overall application. I don’t want (and don’t have the time) to test every single object on every single case in every single part of the stack.
Here is my preferred and almost too simple workflow:

  1. Think about the feature
  2. Write the feature
  3. Test the feature (RSpec and Capybara)
  4. Deploy with acceptable level of confidence

The testing part is in #3 exactly where it belongs. That’s right, this means no TDD for me. Doesn’t mean TDD isn’t good, it just means it isn’t essential in order to write good and solid code. Experience and some programming skills is what it takes to do that. And whilst it’s true that I could reverse the order of step #2 and #3, the thing is that with me the “thinking” part often blends with the “writing” part. I think the overall feature, then I start writing and continue my thinking along the way, improving the solution I had thought up initially. When I’m happy with the result, I add my feature tests.
Also, even if Full-stack tests are valuable to me, I don’t test everything. Again, time is my most precious resource, I don’ want to waste it in testing mundane stuff.
My tests will target the specific features I am writing on a given project. The workflow of the feature is what matters more to me. I will write tests to make sure that everything happens in the correct order, and in the correct manner as it was thought up by my brain (Thinking. That’s point #1 in my workflow above!). I will write the “happy path” first and then will write some unhappy tests to make sure that the correct error messages / feedback is given to the user.
Once I have that, I have something valuable and it’s enough for me. I can forget the project and come back a few weeks/months later with a level of confidence high enough to refactor or add new features.

Rails isn't trendy anymore. Hooray for Rails!

When Ruby on Rails was the most trendy thing in the web development world, I felt so cutting-edge! The coolest thing to develop with was Rails and I was developing with Rails. This meant I was the coolest guy living on the earth!
Things have changed. Rails is still alive and strong, but it’s not the flavor of the day anymore. As a freelancer I have the chance to decide to build my new projects using promising technologies such as MeteorJS, React or Angular. In actual truth, I did consider this option as I had that fear lurking in me, you know, that fear which was telling me that If I’d stick with Rails for too long, I would soon become a relic.
But then I remembered that I loved ruby way more than Javascript. And I remembered how pleasant it was to work with Rails. And I remembered how proficient I had become working with this framework along the years. What a waste it would be to drop it all just to use what is popular at the moment. I also believe that rendering HTML and CSS is a job for the server and that sprinkling some Javascript on top of a web application is more than enough most of the time. I still think single page applications are great and have their use-cases but have a tendency to be used even when it feels out of place (content based websites, apps with very little user interactions, etc). I might be wrong, but this is where I stand today.
Today, Rails has something very valuable it didn’t have at the beginning: maturity. It feels so good to use such a polished and solid framework that has proven its merits again and again throughout the years. The community is still very strong and friendly and I’m extremely glad to be a part of it. Rails 5 will soon be released and I’m still excited as I was when Rails 3 was just around the corner.
I am going to leave you with something to meditate:

Ruby and Rails are like a couple of lovers: Ruby is the beautiful woman, the precious jewel, the inspiration. And Rails is the man, the hero, the guardian who protects the jewel and make it shine even brighter.

Now, that’s something. How poetic is that! Can we say the same about Javascript?!
UPDATE
Hey, even Matz think this was poetic! 🙂

How to backup your postgres database on SpiderOak using Dokku

Now that we know how to setup a rails application using Dokku on a DigitalOcean droplet, it might be a good time to think about automating our database backups. If you haven’t read the first part, you should do it before reading any further.
Sure, you can enable weekly backups of your whole droplet on DigitalOcean (the cost is minimal), but for a database it is wiser to backup at least once a day. Let’s configure the whole thing. We are freelancers (or small development teams) and we are used to get our hands dirty and do stuff by ourselves. It’s not a question of not having enough money to pay someone else, it’s because we are smart and resourceful! See, it already feels better when we see it in this light!
We will use SpiderOak to store our backups. Their zero-knowledge architecture will make sure our data remains private.
UPDATE: Whilst SpiderOak is not free, they offer a 60-days free trial for 2GB storage (no credit card required). After that, the cost is $7 per month for 30 GB storage. Thanks to NoName in the comments for asking me to clarify this point.

Create an account on SpiderOak

We will first install the client on our local workstation and create our account.
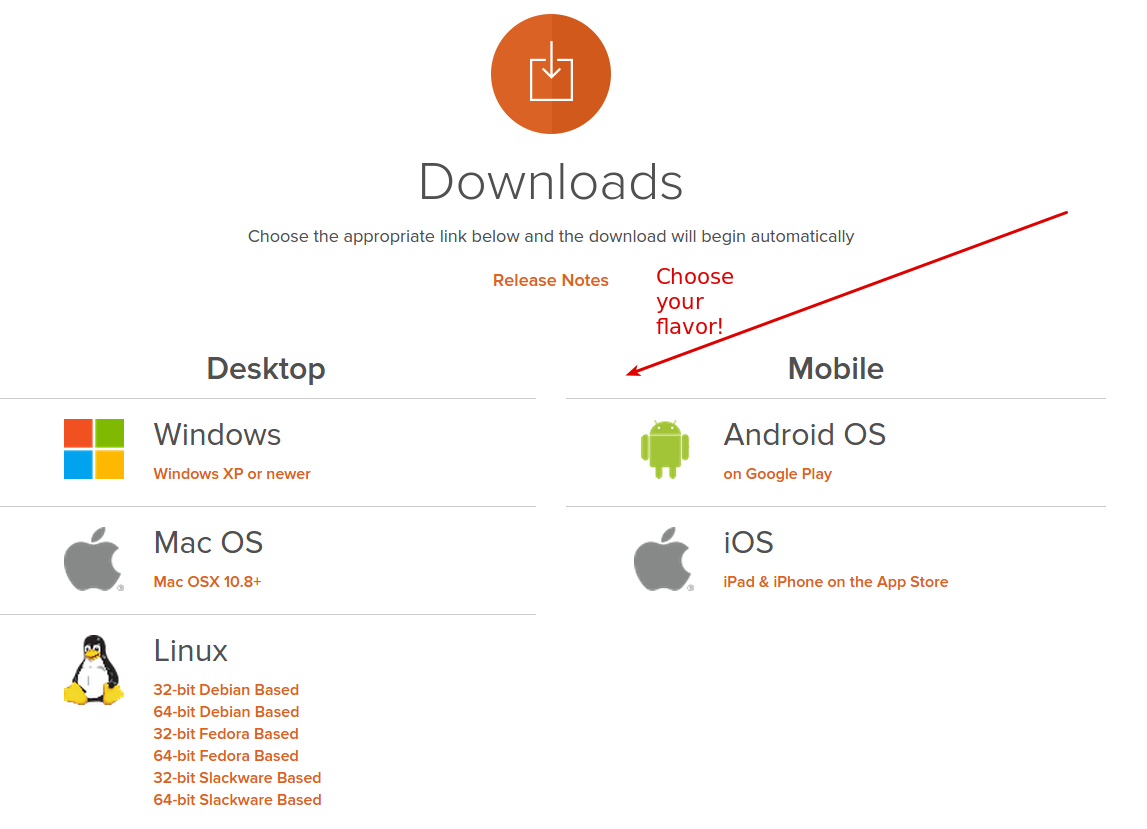
On the SpiderOak page, click on downloads
Click download link
Then, choose the correct client for your distribution:
Choose your SpiderOak client
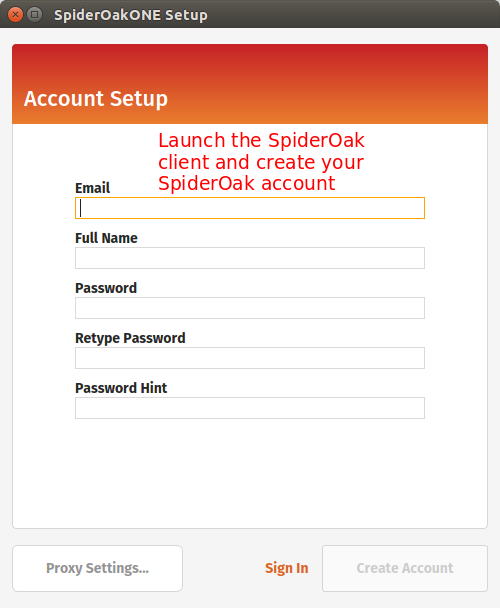
Run the installer. You should be presented with the following screen:
Enter your info and create your SpiderOak account
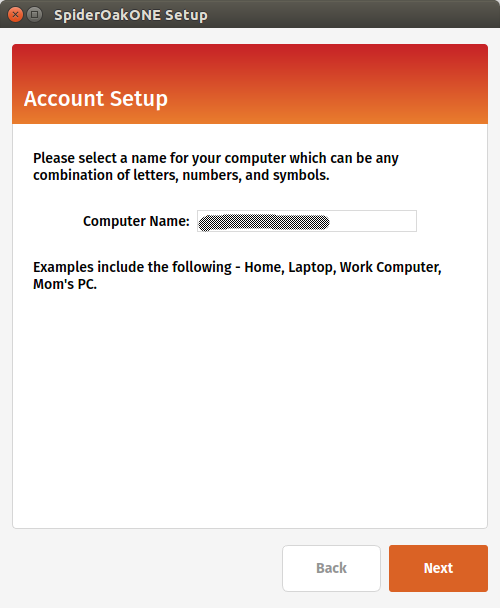
Next step is to register your local computer with SpiderOak.
Choose your SpiderOak client
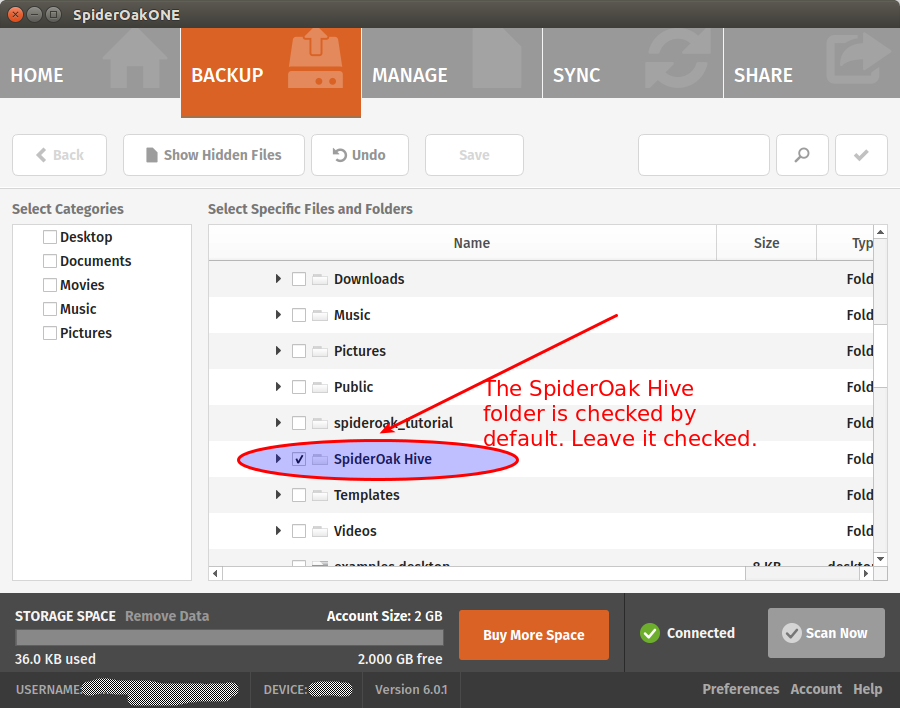
Finally, you will be presented a screen to select what you want to sync from your local computer to the cloud. You can leave the default options for now:
Choose your SpiderOak client

We won’t use the SpiderOak “Hive” folder

SpiderOak creates the SpiderOak Hive folder in the installation process. All files added to the Hive folder of a device are automatically synced to the Hive folder in every other devices. It is a convenient way to have things running quickly without configuring shared folders manually. One problem of using the Hive for our backups is that it will sync everything. You put something personal in your Hive on your local computer and oops, it will be sent to your droplet! That sounds not very good to me. For this reason, we should disable the Hive Folder syncing.
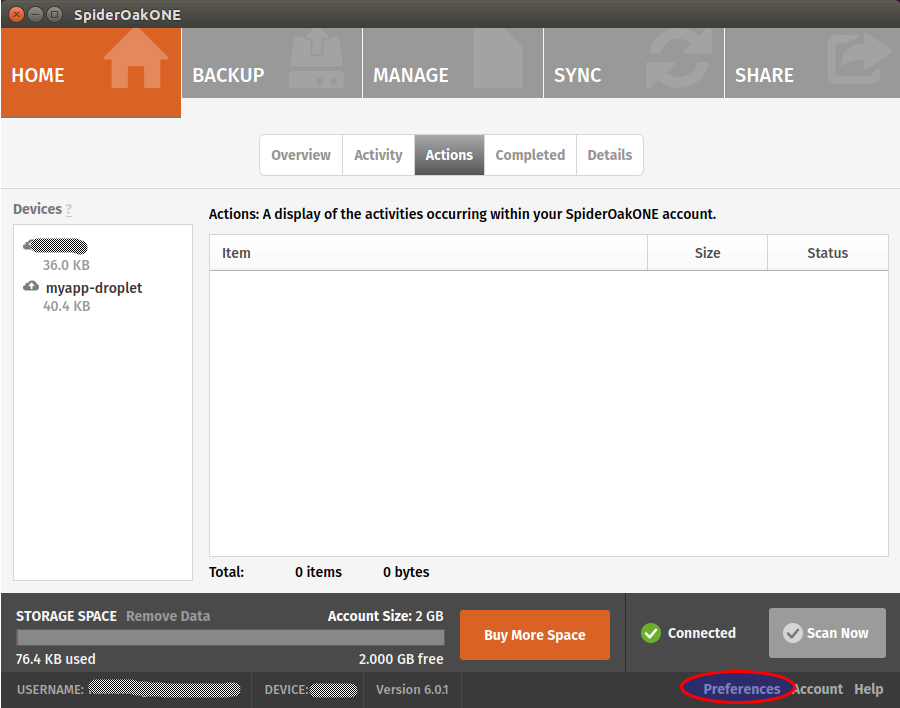
Still on your local workstation, go to your SpiderOak preferences:
Where are the preferences? Here!
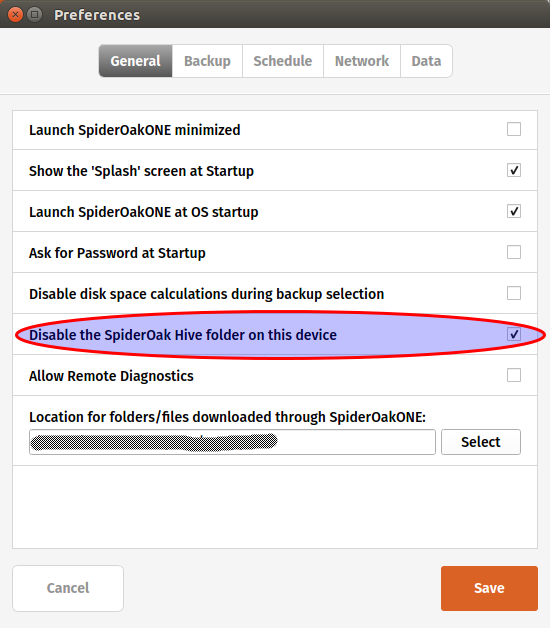
And disable the hive:
Disable the hive
Note that if you don’t mind syncing your personal Hive on your DigitalOcean droplet, you can leave the option enabled.

Add your droplet as a SpiderOak device

Log to your DigitalOcean droplet by typing:

ssh root@your-domain-or-droplet-ip

Open your sources.list file

nano /etc/apt/sources.list

And add the following line at the end:

deb http://apt.spideroak.com/ubuntu-spideroak-hardy/ release restricted

Save, exit and run

apt-get update

If you get the following error:

W: GPG error: http://apt.spideroak.com release Release: The following signatures couldn't be verified because the public key is not available: NO_PUBKEY A6FF22FF08C15DD0

Look at it straight in the eye and IGNORE IT without showing mercy.
You’re now ready to install SpiderOak

apt-get install spideroakone

We must now configure SpiderOak but we don’t have any GUI on our server. What will we do? Simple, we just run the following command:

SpiderOakONE --setup=-

You will have to provide your SpiderOak login info.

Login: [email protected]
Password:
Logging in...
Getting list of devices...
id	name
1	your_local_workstation
To reinstall a device, enter the id (leave blank to set up a new device):

Don’t type any number. Simply press Enter as suggested to set up a new device. It will ask for the name of the device. Enter a descriptive name, something like myapp-droplet. Wait until the end of the syncing process. It may take several minutes, be patient!
Let’s create a folder for our DB backups

mkdir /home/dokku/db_backups

Then we include this folder in SpiderOak:

SpiderOakONE --include-dir=/home/dokku/db_backups

The output should look like this:

Including...
New config:
Current selection on device #2: u'myapp-droplet' (local)
Dir:/home/dokku/db_backups
Dir:/root/SpiderOak Hive
ExcludeFile:/root/SpiderOak Hive/.Icon.png
ExcludeFile:/root/SpiderOak Hive/Desktop.ini
ExcludeFile:/root/SpiderOak Hive/Icon
ExcludeFile:/root/SpiderOak Hive/.directory

Great, SpiderOak is all configured! Time to setup our database backups.

Create a shell script

Create a new file in /home/dokku and name it backup_db.sh. Paste the following:

#!/bin/bash
/usr/local/bin/dokku postgres:export myapp  > "/home/dokku/db_backups/myapp-`date +%Y-%m-%d`.dump"
/usr/bin/SpiderOakONE --batchmode
exit

Give the correct permission to the file:

chmod +x /home/dokku/backup_db.sh

As you can see, we use our Dokku postgres plugin to dump our db and we gzip the result in our db_backups folder. Then we run SpiderOakONE with the –batchmode flag to make it do its thing and shutdown immediately after.

Setup a cronjob

To automate our DB backups, we’ll add a cronjob.

crontab -e

Add the following line, save and exit:

0 5 * * * /home/dokku/backup_db.sh OUT_BACKUP 2>&1

It will run our backup script at 5am everyday. That’s all we need for now. Hmm… perhaps you don’t want to wait at 5am just to test if the script works. In this case, run the script directly.

cd /home/dokku
./backup_db.sh

The call to “SpiderOakONE –batchmode” will probably make this command run slowly. I don’t know what SpiderOak is doing exactly but sometimes it can take several minutes to complete the syncing.
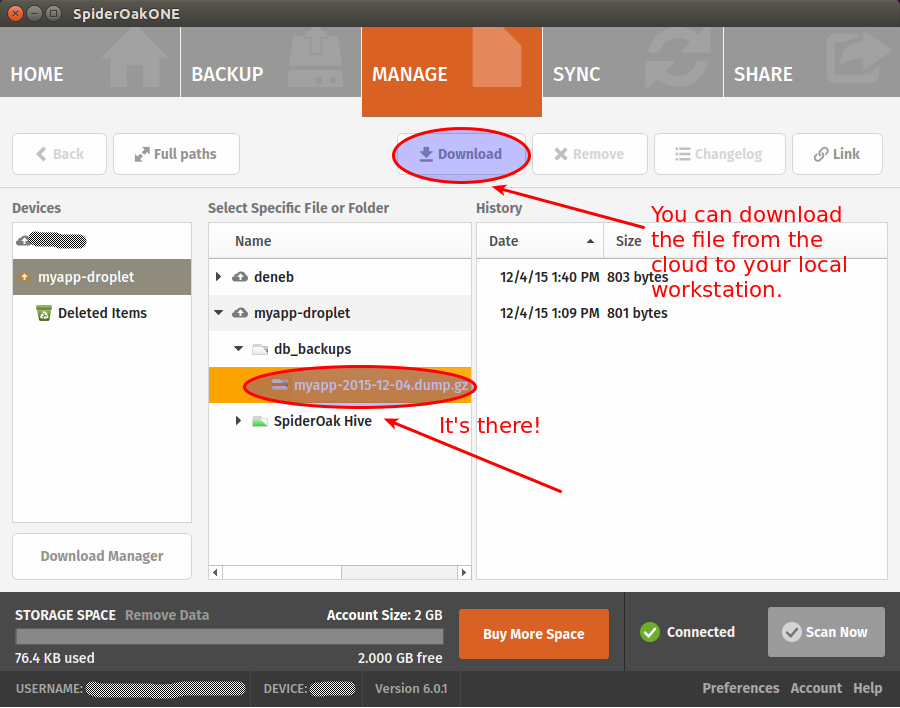
Once it finally completes, go back to your local workstation to see if you can find your backup.
Your backup is here!
If you want, you can make sure that you are able to restore your backup before calling it a day (have a look at the dokku postgres:import command to that end). Restoring postgres databases usually gives of warnings but it’s generally safe to ignore them. Still, you’re better to make sure everything work as expected.
That’s it! You now have automated database backups on a zero-knowledge cloud architecture. Hope you enjoyed this tutorial! As usual, your comments are much appreciated.

My brief rant against SPA

I know I sound like an old coot whose afraid of change, but there is something that doesn’t feel right for me with the new Single Page Application craze. It’s like all of a sudden, we’ve decided that web applications are crappy and that we want a return to traditional client/server applications. It’s a if we cannot tolerate a page refresh anymore and we want to manage the state of our applications like we were doing in 1995!
Would StackOverflow be better for the end user if it was built with Angular or Meteor? Nope. There are use cases where SPA shine, I can understand that. But for a standard web application or a website? I don’t believe it is needed. The web has been built around the idea of resources. Each URL on the web is supposed to be a document, not an app that you download. We have to come to our senses here. We should not work against the fundamentals of the WWW. If we destroy the basics of the web because of our thirst to create rich client applications, we’re doing a terrible mistake.

Keeping secrets secret without using .gitignore

In the past I used to keep all files containing sensitive data (passwords, api keys and other secrets) out of my git repository. For example, I would add database.yml in the .gitignore file. Then I would put my database.yml on my production server in the « shared » folder. Finally I would ask capistrano to create a symlink to that file in the deployment recipe. This has been fine with me for a while.
But one day, a small gnome came in my home office, all dancing and laughing. So i said : « what are you doing here, little gnome? ». He first told me that I should not speak to him aloud like that, as it would probably scare my wife and my kids and that they would start being concerned with my mental health. « Good point, I kept to myself ». Then, he told me : « There is a better way! You don’t have to rely on .gitignore if you don’t want to expose your secrets. Let me show you how…»
Since that day, my application files that contain secrets are in my repository. And, as you probably guessed, I use environment variables in those files instead of plain-text secrets, exactly like it is suggested in the secrets.rb file of a rails project. You probably have seen it already:

# Do not keep production secrets in the repository,
# instead read values from the environment.
production:
  secret_key_base: <%= ENV["SECRET_KEY_BASE"] %>

Hey, It’s not rocket science! Why a blog post about this!?
Because I struggled at first to set these environment variables correctly. How to set the variables in developement? How to set them in production?
At first I tried using the rbenv-vars plugin both in development and in production. rbenv-vars is a simple plugin for rbenv that let you declare environment variables in a straightforward manner. You just create a .rbenv-vars file in your application directory that looks like this :

DB_USER=db user
DB_PASS=db password
aws_access_key_id=some access key here
aws_secret_access_key=secret access key here

And you’re ready to go (as long as you use rbenv!). Of course this file should not be in your repository as it contains secrets. And since the file is not really a part of your application to begin with, adding it to .gitignore makes complete sense. Anyway, to the point. rbenv-vars worked perfectly on my development machine, so I decided to use it in production, but it didn’t work very well this time.
The Phusion Passenger gotcha
On one of my production server, I use Phusion Passenger, and no matter what I tried it would not set the environment variables configured in my .rbenv-vars file. I know others had success with this approach but it didn’t work for me.
If you use Phusion Passenger (>= 5.0) like me and .rbenv-vars doesn’t work for you neither, just set the environment variables in your nginx or apache configuration file, like this (I use nginx) :

server {
  listen 80;
  server_name mygreatapp.com
  root /home/username/apps/mygreatapp/current/public;
  passenger_ruby /home/username/.rbenv/versions/2.2.4/bin/ruby;
  passenger_enabled on;
  passenger_env_var SECRET_KEY_BASE supersecret
  passenger_env_var DB_USER mydbuser;
  passenger_env_var DB_PASSWORD shhhItsSecret;
}

All in all I’m really happy with this approach. It allows me to keep files like secrets.yml and database.yml in my repository (instead of gitignoring them) without exposing passwords or other secrets.